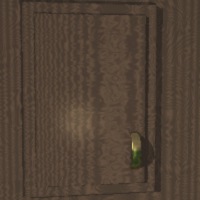
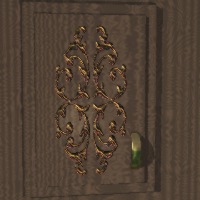
In our Vue, we have a scene,
and in that scene we have a cabinet. The cabinet has a door with a brass
handle. It's a nice door, but it's rather plain, and we want this to be a
fancy cabinet door. Yet we don't want to add a lot of polygons to our scene.
What can we do?
Luckily, Vue lets us get fancy without
adding much "weight" to the scene. To accomplish this for our door, let's
move to our paint program, where we'll need to create 3 images.
(Note: to create this design, I used a dingbat font element which was mirrored
vertically and horizontally. I gave the design 3-dimensional texture using
Blade Pro.)
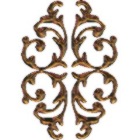 The first image is the decorative design we want to add to our door. Make
it in full 24-bit color. The background can be filled or left blank.
The first image is the decorative design we want to add to our door. Make
it in full 24-bit color. The background can be filled or left blank.
You want to create this image at least as large as it'll ever be when you
render it. If you typically render extremely large images, you may want to
make this as large as 1000 x 1000 pixels. Otherwise, 300 x 300 or 500 x 500
will do nicely. Whatever size you choose, all three of these images should
have the same proportions; note that a square canvas shape will be easier
to work with than a rectangle.
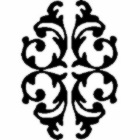 The second image is the alpha mask
for our design. Note the image area is solid black; what we want transparent
is solid white. The second image is the alpha mask
for our design. Note the image area is solid black; what we want transparent
is solid white.
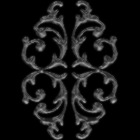 The third image is the grayscale version
of our decoration, to become the bump map. The third image is the grayscale version
of our decoration, to become the bump map.
Now that we have our images made,
let's turn them into an image object in Vue.
1 - Add a Plane primitive to the
scene. Rotate its position so that it stands vertically.
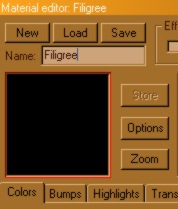 2 - With the Plane selected, right-click the
Material summary and select Edit Material. When the material window opens,
select New at the top left of the screen. Give this material a name; I called
mine "Filigree." 2 - With the Plane selected, right-click the
Material summary and select Edit Material. When the material window opens,
select New at the top left of the screen. Give this material a name; I called
mine "Filigree."
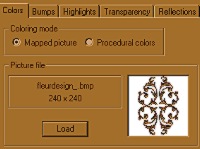 3 - On the Color tab, select Mapped
Picture, click the Picture button and navigate to where you stored your full
color decoration image. 3 - On the Color tab, select Mapped
Picture, click the Picture button and navigate to where you stored your full
color decoration image.
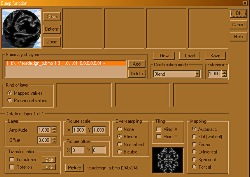 4 - On the Bump tab, right-click to open the
Bump Function panel. Select Mapped Values, and when the screen changes, click
the Picture button towards the bottom of the screen and navigate to where
you stored your grayscale decoration image. 4 - On the Bump tab, right-click to open the
Bump Function panel. Select Mapped Values, and when the screen changes, click
the Picture button towards the bottom of the screen and navigate to where
you stored your grayscale decoration image.
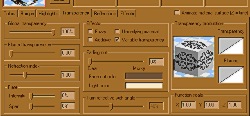 5 - On the Transparency tab, set the
Transparency to 100%. To the middle, select Variable Transparency. This opens
the Transparency Production editor to the right. Right-click that editor
and select Mapped Values. Click the Picture button and navigate to where
you stored your black & white image. 5 - On the Transparency tab, set the
Transparency to 100%. To the middle, select Variable Transparency. This opens
the Transparency Production editor to the right. Right-click that editor
and select Mapped Values. Click the Picture button and navigate to where
you stored your black & white image.
Now align your Plane object as closely
as you can against the cabinet door object, without accidentally "embedding"
it. Do several preview renders to assure you're getting the best
positioning.
And hurray! Out cabinet door is now quite elaborately decorated, using a
single Plane of only 2 polygons!
|