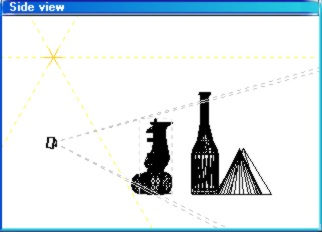
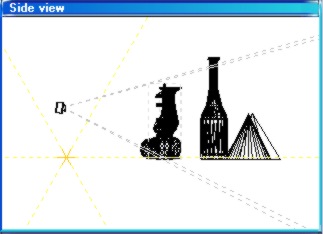
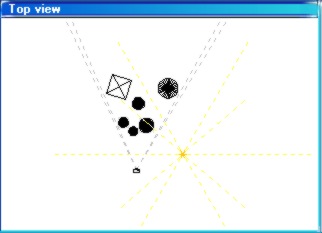
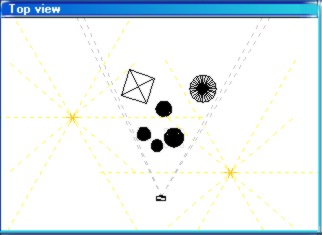
| To understand lighting positions,
it helps to imagine a crosshairs diagram emanating from around the subject.
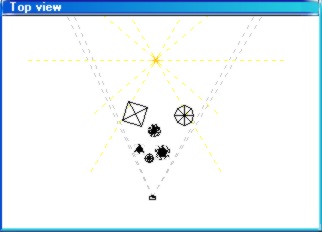
Looking down from overhead, the diagram looks like this:
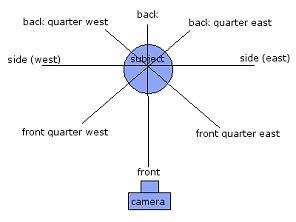
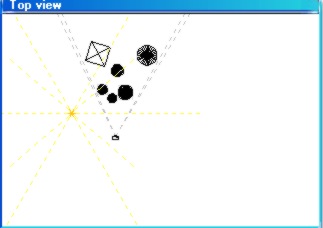
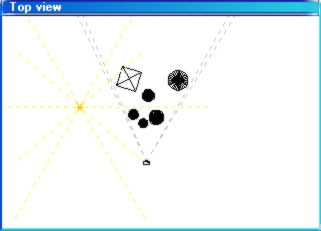
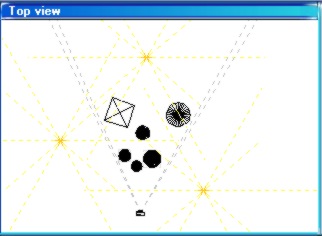
A similar diagram would be imagined
if looking from a front view, to achieve understanding of overhead and lowered
lighting positions.
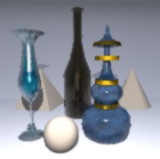
A single light in any one of these
classic positions will yield a satisfactory result; which position will depend
on the effect you aim to achieve. Here are some samples of single-lamp
lighting.
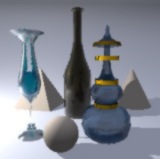
Front Lighting
With frontal lighting, the single lamp is positioned very near to
the camera's position.
|
 |
 |
|
Overhead Lighting
The overhead position can be anywhere higher than the camera's position.
I've shown it here from the front, but it can also be quarter, side
or back overhead.
|
 |
 |
|
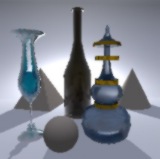
Backlighting
A back light can add a dramatic effect to a subject. It is often used
to highlight edges of hair on a human model.
|
 |
 |
|
Light from Below
Under light can be positioned anywhere lower than the camera's position.
It can be front, quarter, side or back positioned.
|
 |
 |
|
Light Quarter West
Quarter lighting is very flattering for human faces.
|
 |
 |
|
Light Quarter
East
Quarter lighting is very
flattering for human faces.
|
 |
 |
|
Light Side West
Strong side lighting is another method for adding drama.
|
 |
 |
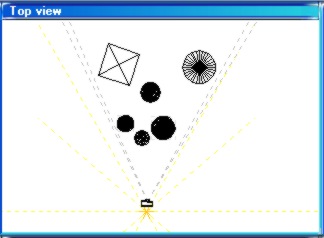
Once you understand the basic imaginary diagram for the lamp positions, you
can begin to combine two and three (or more) lights together as best suits
your particular subject. Here are samples of combination double and triple
lamp lighting.
Lights (2)
Quarter-East
Side-West
Notice how the shapes
of objects are being molded by the light and shadow.
|
 |
 |
|
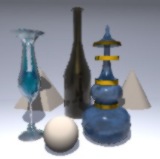
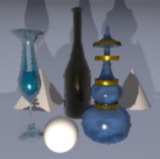
Lights (3)
Quarter-East
Side-West
Back
While the object shapes are
nicely defined, the shadows are now beginning to be washed-out and less
definitive.
|
 |
 |
I have demonstrated these setups
with level lighting -- i.e. the lamps are vertically level with the camera
-- with the exception of the overhead and underneath samples. All positions
can be used level, overhead or underneath, as desired. All lights shown here
used a Vue setting of 100 power and an incandescent color tint.
|